![]()
![]()
![]()
![]()
![]()
![]()
![]()
![]()
![]()
![]()
![]()
![]()
![]()
![]()
![]()
![]()
![]()
![]()
![]()
![]()
![]()
![]()
![]()
![]()
![]()
![]()
![]()
![]()
![]()
![]()
![]()
![]()
![]()
![]()
![]()
![]()
![]()
![]()
![]()
![]()
![]()
![]()
![]()
![]()
![]()
![]()
![]()
![]()
![]()
![]()
![]()
![]()
![]()
![]()
![]()
![]()
![]()
![]()
![]()
![]()
![]()
![]()
![]()
![]()
![]()
![]()

P.O. Box 14572, Scottsdale, AZ. 85267. Tel: 480-258-1050
New Product SHOWCASE from
Mac's Modeling,LLC.
updated 08/06/2013
This page is just to showcase a new product.
New from
![]() (Click on the thumbnails to enlarge the pictures.)
(Click on the thumbnails to enlarge the pictures.)
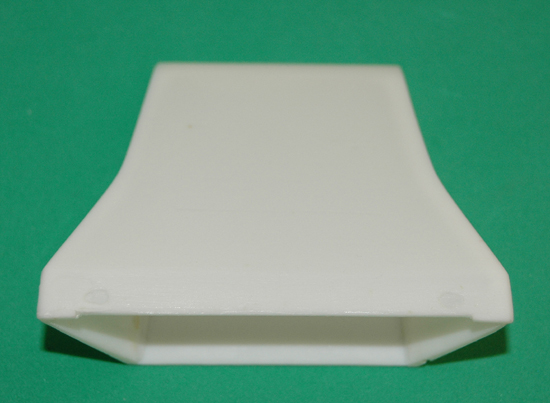
Over the
weekend I completed the shorter nose for the 1976 M23, (AZMP M23 1218) along with the
sub-frame. Which means I am one step closer to offering the complete trans-kits
for the 76 versions.
This nose will probably work for versions from 1975, Round 10 (England) as
well.
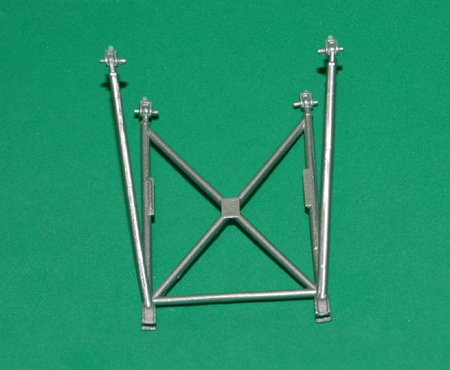
The sub
frame was quite difficult to produce, but I am very pleased with the result.
It comes in 3 pieces.
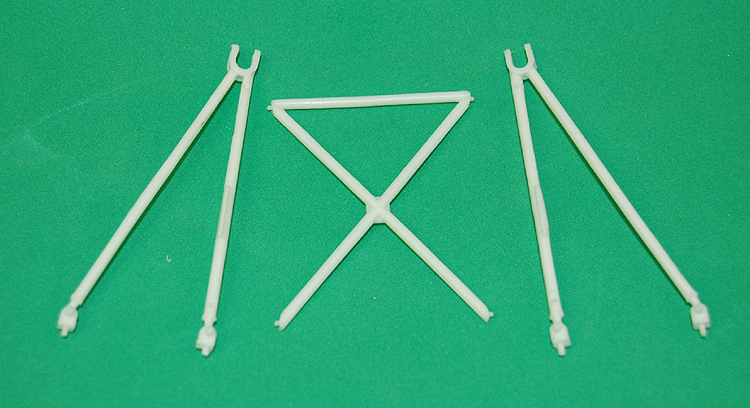
I have tried to produce these with detail and make them easy to put
together, with locating pins and holes.
.jpg) I have obviously cleaned these parts up (removed the
casting flash and lines), but you will need to do that when you
receive your parts.
I have obviously cleaned these parts up (removed the
casting flash and lines), but you will need to do that when you
receive your parts.
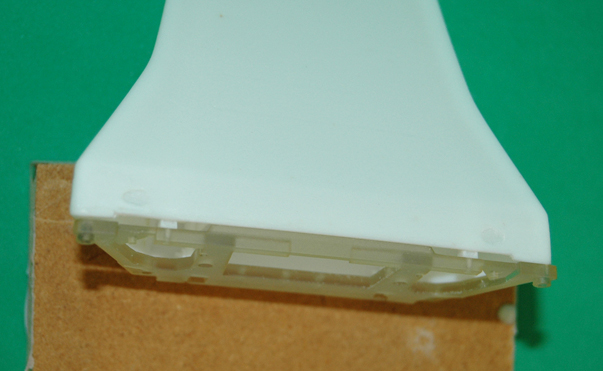
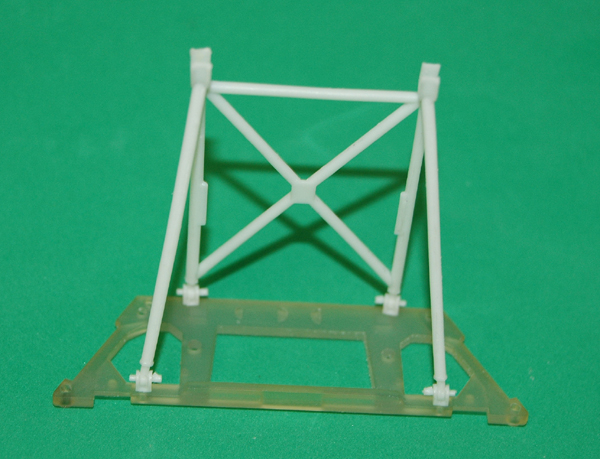 Here the parts are assembled and mounted on the prototype "Firewall".
The sub-frame will also fit the kit firewall, if you want to use that.
Here the parts are assembled and mounted on the prototype "Firewall".
The sub-frame will also fit the kit firewall, if you want to use that.
The
sub-frame will come as part of the Short nose,
 which will include the wings
(which will be ready WE 7/27/13)
and at least templates for the wing end plates.
which will include the wings
(which will be ready WE 7/27/13)
and at least templates for the wing end plates.
The nose has a locating bar cast into it
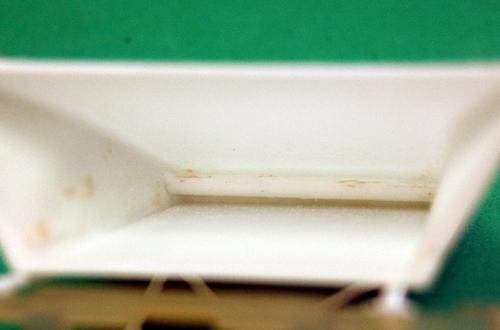 for the sub-frame. When I assembled them it was a very snug fit almost a
"snap" fit.
for the sub-frame. When I assembled them it was a very snug fit almost a
"snap" fit.
 Bit hard to see.
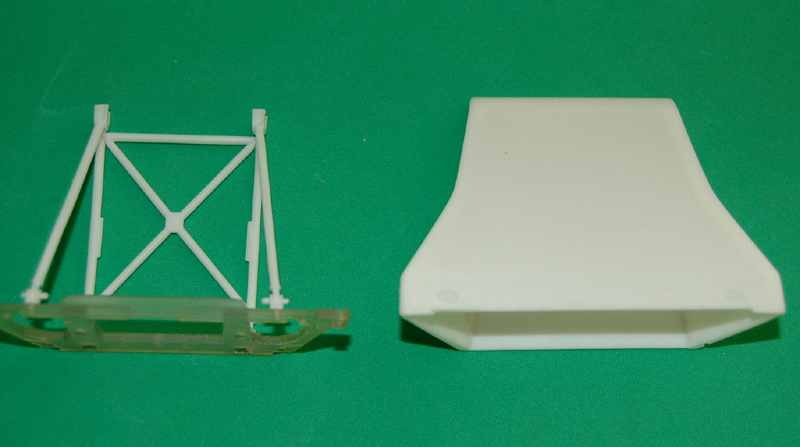
 So if you do not like the fit you will have to loosen it. Here you can see
the sub-frame and nose together.
So if you do not like the fit you will have to loosen it. Here you can see
the sub-frame and nose together.
As usual I
made some wing end plates from 0.015" thick aluminum sheet, using the same
template you will receive with the set, to show how they look.
 Once the endplates were attached, I fitted the "gurney flaps" on the rear edge
of the wings and painted them, first with Tamiya white "fine" primer, followed
by Tamiya TS-26 Pure white. At the same time I painted the nose
Once the endplates were attached, I fitted the "gurney flaps" on the rear edge
of the wings and painted them, first with Tamiya white "fine" primer, followed
by Tamiya TS-26 Pure white. At the same time I painted the nose
 While these were curing I painted the sub-frame with Tamiya Aluminum
After a
couple of days, I masked off the nose, to paint the chevron. I did this very
quickly as with all these little "showcase" projects. I painted it with
a combination of 2 very thin coats of TS-36, followed by 3 very fine coats of
Tamiya MS-8, then finished off with very fine coats of MS-9 until I was happy
with the color.
 There was no sanding between coats, and probably 1 minute maximum between
coats. I removed the masking tape approx. 2 minutes after the last coat. The
actual color is slightly darker once it completely dries, so I suggest you do
all the body and wing painting at the same time using the exactly the same
process on them. Because it will be unlikely to reproduce the exact same color
again.
There was no sanding between coats, and probably 1 minute maximum between
coats. I removed the masking tape approx. 2 minutes after the last coat. The
actual color is slightly darker once it completely dries, so I suggest you do
all the body and wing painting at the same time using the exactly the same
process on them. Because it will be unlikely to reproduce the exact same color
again.
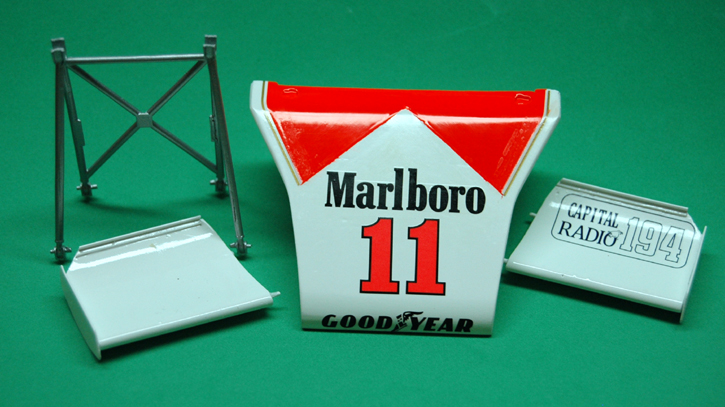
As I said this is just to show roughly what the set can look like. As you can
see I applied the decals to finish it off.
So this is
how the set can look, you can make it look better with more care.
 After I completed this I checked all the images I have from 1976, when I
realized the nose/wing configuration was different for the Japanese GP, which
was what I had been looking at when I positioned the angle of the front wings.
If you are building a kit for any race other than Japan, you will need to
remove the rear pin on the front wings and fill in the rear dimple in the
sides of the nose, that way you will be able to give the wings the lower
angle, as can be seen here.
After I completed this I checked all the images I have from 1976, when I
realized the nose/wing configuration was different for the Japanese GP, which
was what I had been looking at when I positioned the angle of the front wings.
If you are building a kit for any race other than Japan, you will need to
remove the rear pin on the front wings and fill in the rear dimple in the
sides of the nose, that way you will be able to give the wings the lower
angle, as can be seen here.
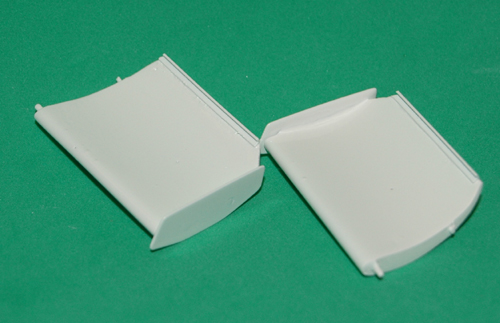
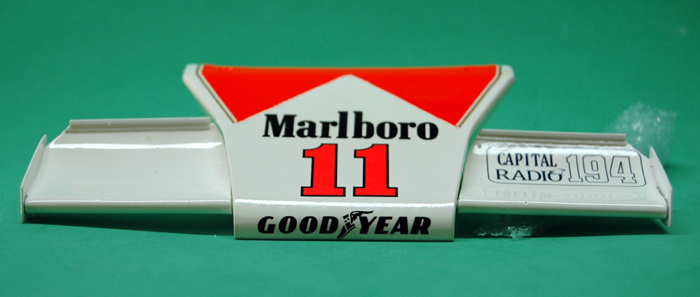 I have not attached the wings in that picture, but the wing on the right is a
lower angle and has the decal on for the British GP.
I have not attached the wings in that picture, but the wing on the right is a
lower angle and has the decal on for the British GP.
Also I
completed the molds for, what I call suspension "firewalls".
![]() AZMP M23 1210. The framework that you mount the suspension parts to
AZMP M23 1210. The framework that you mount the suspension parts to
.jpg)
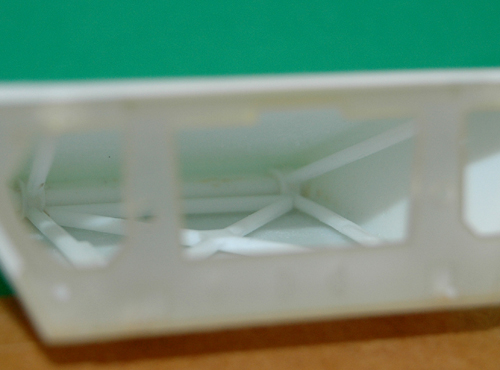
![]() and the nose sub-frame,
that is exposed when the nose is removed.
and the nose sub-frame,
that is exposed when the nose is removed.
.jpg) This set, which includes the front
wall and two sub walls behind,
This set, which includes the front
wall and two sub walls behind,
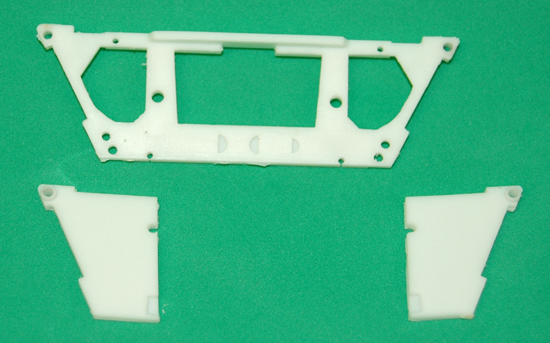 can be used for versions from 1975 onwards.
The front section has two location holes for mounting the lower A arms.
Which were used at various times for different set-ups. You will
have to add the second hole in the kit part for the back mount of the A arm
if you want to use the higher location. Also you will need to modify the
lower A-Arm (shorten it) to use that position.
To allow
these parts to be used you will need to modify the kit body, top and bottom.
Use the template
.jpg) supplied. Cut it out and attach it to the top of the body
supplied. Cut it out and attach it to the top of the body
.jpg) and cut the body to match the template and drill the new hole
and cut the body to match the template and drill the new hole
.jpg) for the windscreen locating pin (for the 1976 version)
being a little more careful
for the windscreen locating pin (for the 1976 version)
being a little more careful
.jpg) about it than I was. The modification to the bottom is very easy
about it than I was. The modification to the bottom is very easy
.jpg) I marked the parts that need to be removed with a green felt tip.
I marked the parts that need to be removed with a green felt tip.
.jpg) I removed the parts with a "sprue" cutter and then sanded the excess off.
I removed the parts with a "sprue" cutter and then sanded the excess off.
Send your order to orders@macsmodeling.com, put AZRM in the subject line and how many you would like in the body of the email, or use the order form and send it to the same email address, the same way.
Mac
Links to previous Showcase items.
AZMP M23 1208 Narrow nose for 1:12
Tamiya M23
AZMW12001 Wheels for 1:12 Tamiya Ferrari 312B
AZRM 1:12 Mesh Velocity Stack
covers
Scale
Spark plug wire
CRAFT1O
figures
ICON Automotive miniatures, Rain tires
AZRM 1:20 scale
Anodized wheels
AZRM colored heat shrink tubing
1:12 scale Motorcycle chains
1:12 scale Motorcycle
figures