![]()
![]()
![]()
![]()
![]()
![]()
![]()
![]()
![]()
![]()
![]()
![]()
![]()
![]()
![]()
![]()
![]()
![]()
![]()
![]()
![]()
![]()
Mac's Modeling, LLC.
Reproducing Weld lines (Updated 1/31/09)
There have been a lot of questions regarding reproducing weld lines, and I have never seen a definitive answer. So I decided to find out the best way.
I have seen many suggestions as to the material to use for weld lines, recently including "Liquid Nails" a construction glue in large tubes. (I use that in our every day business installing granite counters) So knowing the consistency, I thought that sounded like a good idea. Dispensing it was what I needed to decide on.
I went on a trip to my local hobby store
"Frank's" and searched through everything they had and came out with a couple of
syringe applicators with a curved nose
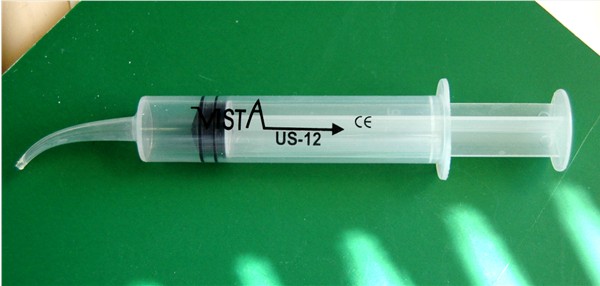 I thought that might work well. While I was there I was telling one of the older
guys that worked in the store that I was trying to recreate weld lines; he
suggested "Elmers Glue". So another item to add to the shopping list.
I thought that might work well. While I was there I was telling one of the older
guys that worked in the store that I was trying to recreate weld lines; he
suggested "Elmers Glue". So another item to add to the shopping list.
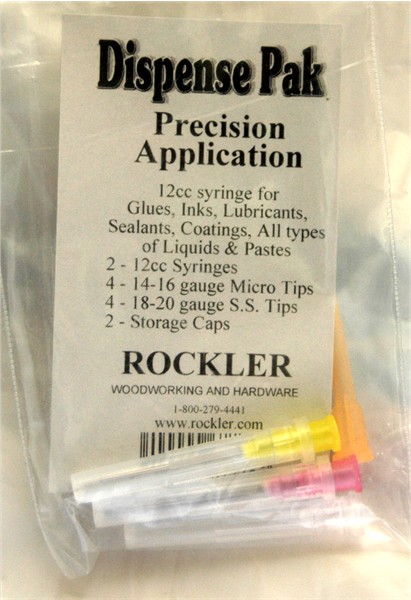
I still needed more items and I remembered
the local Woodworker's Hobby shop "Rockler
Woodworking and Hardware" they are all over the USA. I managed to pick up a pack
which contained two syringes and a few applicator tips, plastic and blunt
stainless needles
 and another pack
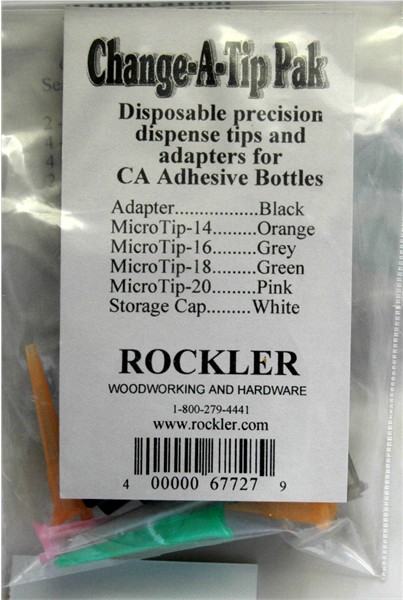 with a conversion cap and applicator tips. I also picked up a different type of
applicator bottle
with a conversion cap and applicator tips. I also picked up a different type of
applicator bottle
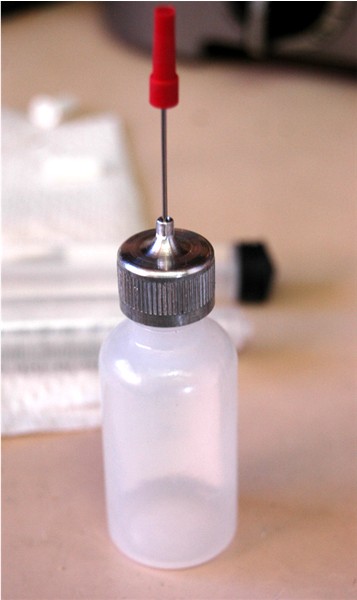 the conversion cap will fit it. Very handy bottle to have though anyway. (I
have another that I use for applying cutting fluid on small parts I am
machining.) Rockler's have all kinds of stuff you can make use of when
making models, even Epoxy's.
the conversion cap will fit it. Very handy bottle to have though anyway. (I
have another that I use for applying cutting fluid on small parts I am
machining.) Rockler's have all kinds of stuff you can make use of when
making models, even Epoxy's.
My next stop was the local Hardware store
"Ace Hardware". That was for some "Liquid Nails" ands see what else might work.
I picked up a small container of "Spackle Paste" ready mixed and a small pack of
wood filler
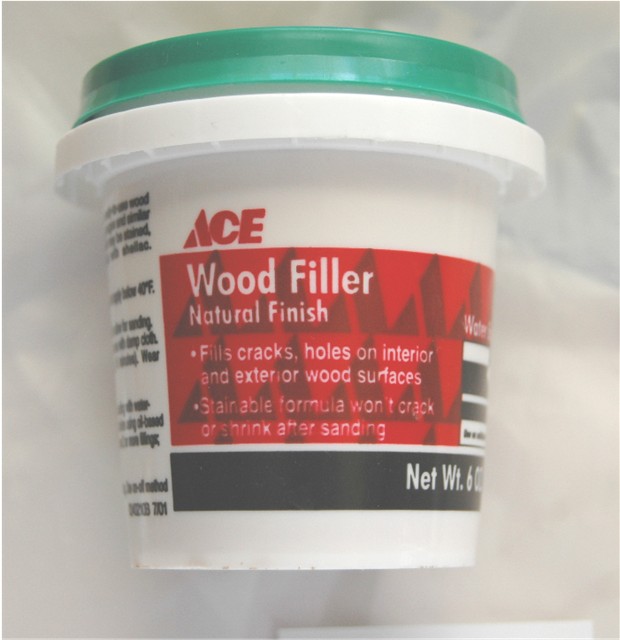 as I think these will have the consistency to hold the shape without loosing
detail.
as I think these will have the consistency to hold the shape without loosing
detail.
Once I got home, I prepared a piece of plastic sheet, by scribing some lines in it. I decided to do that because welded parts usually have a bevel on the edge so the finished weld is closer to the surface, also I could maintain a straight line.
I knew the Liquid Nails would not be an
easy clean up, so I decided to look at the instructions on the Spackle and wood
filler. Well, the Vinyl spackle I bought cannot be used on plastic! :( So that
is ruled out immediately, maybe I can take it back and get a refund. The wood
filler seems fine and it is water clean up. :) So I scoop some out and put it in
the first syringe with the curved nose. I squeezed the plunger until some
started coming out of the end and then moved the syringe slowly, in very tiny
stop go motion, to try and get the "puddle" lines. It went very smoothly and
looked pretty good, but it did settle a little.
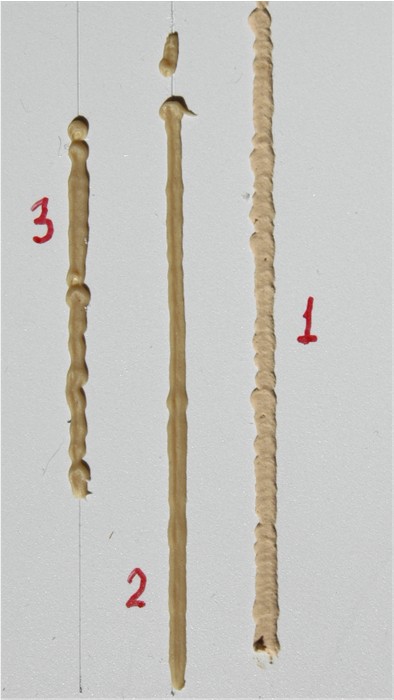 It's #1 on the picture. It ended up 0.075" wide and 0.016" above the surface.
Line 2 and 3 are the liquid nails, but not through the same syringe as I decided
the hole in the end was too big. So I used the regular syringe with the
Stainless 18 gauge tip. For line #2 I moved at a similar rate and action as the
first attempt, but you can see in dropped into the scribed line, so not a good
result. For line #3 I tried to move a little slower and squeeze more out,
however, it lost the detail and still dropped into the scribe line.
It's #1 on the picture. It ended up 0.075" wide and 0.016" above the surface.
Line 2 and 3 are the liquid nails, but not through the same syringe as I decided
the hole in the end was too big. So I used the regular syringe with the
Stainless 18 gauge tip. For line #2 I moved at a similar rate and action as the
first attempt, but you can see in dropped into the scribed line, so not a good
result. For line #3 I tried to move a little slower and squeeze more out,
however, it lost the detail and still dropped into the scribe line.
I change the tip for the 20 gauge
stainless one and just tried to squeeze enough out on the surface without a
scribe line under it. I tried it a couple of times
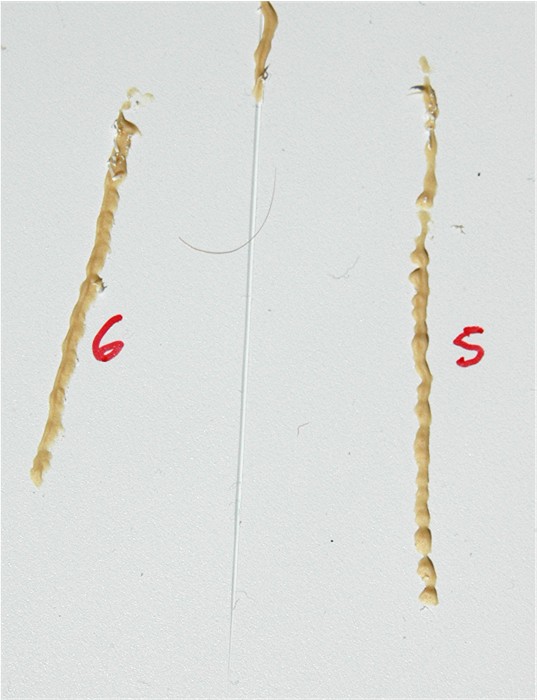 lines 5 and 6. Still lost detail and was not very successful. This is where I
give up on Liquid Nails as a medium that will not work.
lines 5 and 6. Still lost detail and was not very successful. This is where I
give up on Liquid Nails as a medium that will not work.
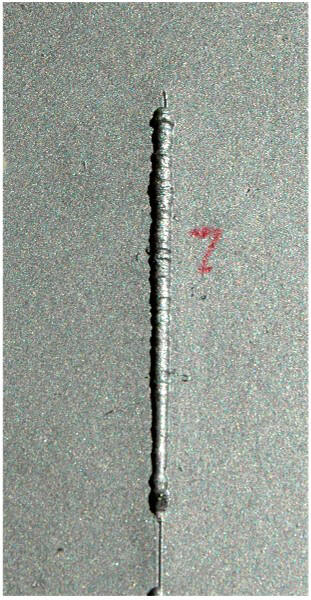
I revert back to the wood filler and the
regular syringe with a plastic "Micro" applicator tip #18 (Green) and produce
line #7. It is approx. 0.064" wide and stands up approx. 0.027".
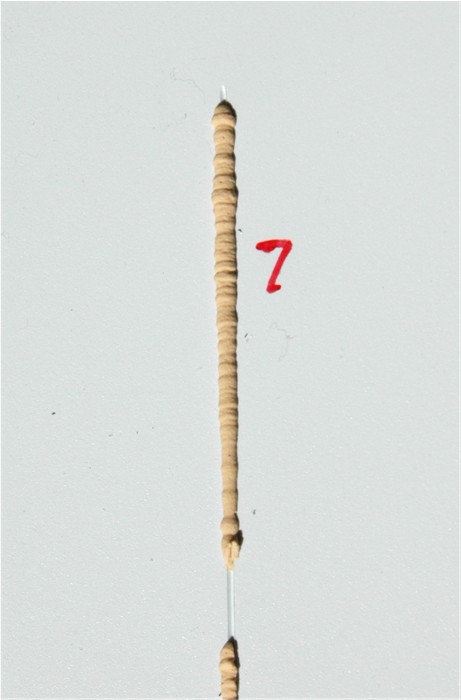 That would be fine for some applications, but it did prove that if I leave it in
the syringe just a couple of minutes before using it, it sets up nicely and
keeps the detail. I sped up a little towards the bottom of the line and you can
see a little difference. I then switched to the Pink micro tip #20, and produced
the last line #8
That would be fine for some applications, but it did prove that if I leave it in
the syringe just a couple of minutes before using it, it sets up nicely and
keeps the detail. I sped up a little towards the bottom of the line and you can
see a little difference. I then switched to the Pink micro tip #20, and produced
the last line #8
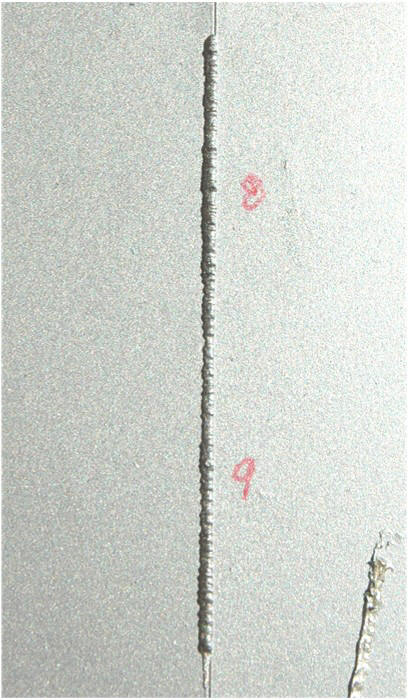
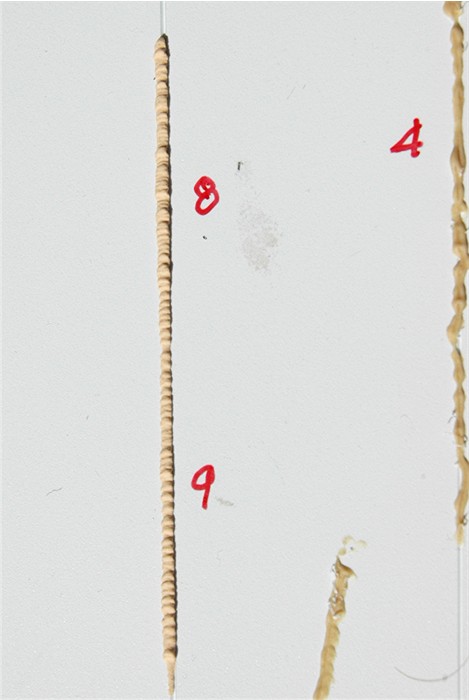 I started off and it seemed like it was too heavy and lumpy, so I went a little
quicker, but I think it looks better as it gets to #9. At the start it is
approx. 0.060" wide and 0.024" tall, as I sped up it is approx. 0.052" wide and
approx. 0.018" tall.
I started off and it seemed like it was too heavy and lumpy, so I went a little
quicker, but I think it looks better as it gets to #9. At the start it is
approx. 0.060" wide and 0.024" tall, as I sped up it is approx. 0.052" wide and
approx. 0.018" tall.
I will now have to spray them with some aluminum paint and see what happens.
This is what they look like,
![]()
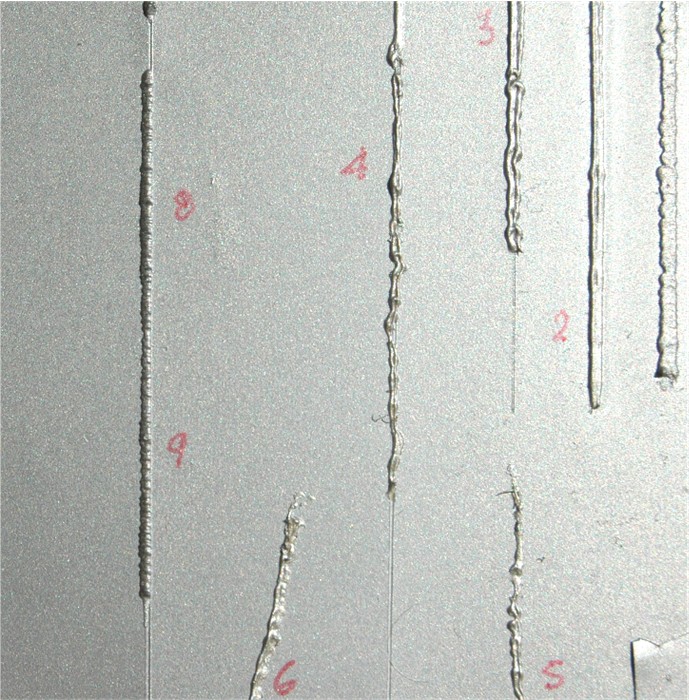
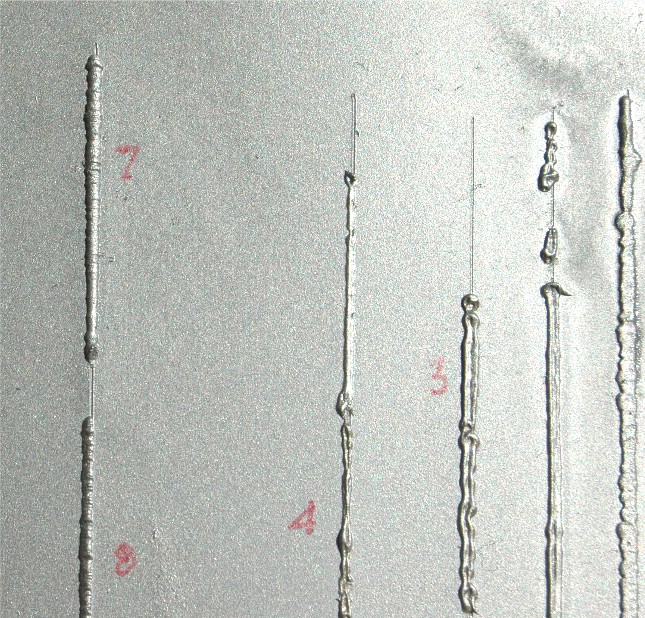 and here you see most of them next to each other.
For sources, obviously Rockler, I have that linked to the specific page on their website and there are more items. Also "Small Parts" out of Florida have a great selection of Blunt stainless tips and syringes. Also Micro-Mark have some applicator tips in 3 different sizes.
I will be doing more tests for myself so I know which tips to use for what scale of weld and what material type of weld.
But my conclusion is the wood filler from Ace Hardware (probably most wood fillers) is the idea medium for reproducing weld lines and a syringe with different size tips is definitely the way to produce them. I hope this helps the rest of you.
(I forgot to mention the Elmer's glue..............No good! It just flattened right out.)
Now go and try it for yourself. If you come up with any other items that work well, let me know and I will add them to this "How-to".
Cheers,
Mac