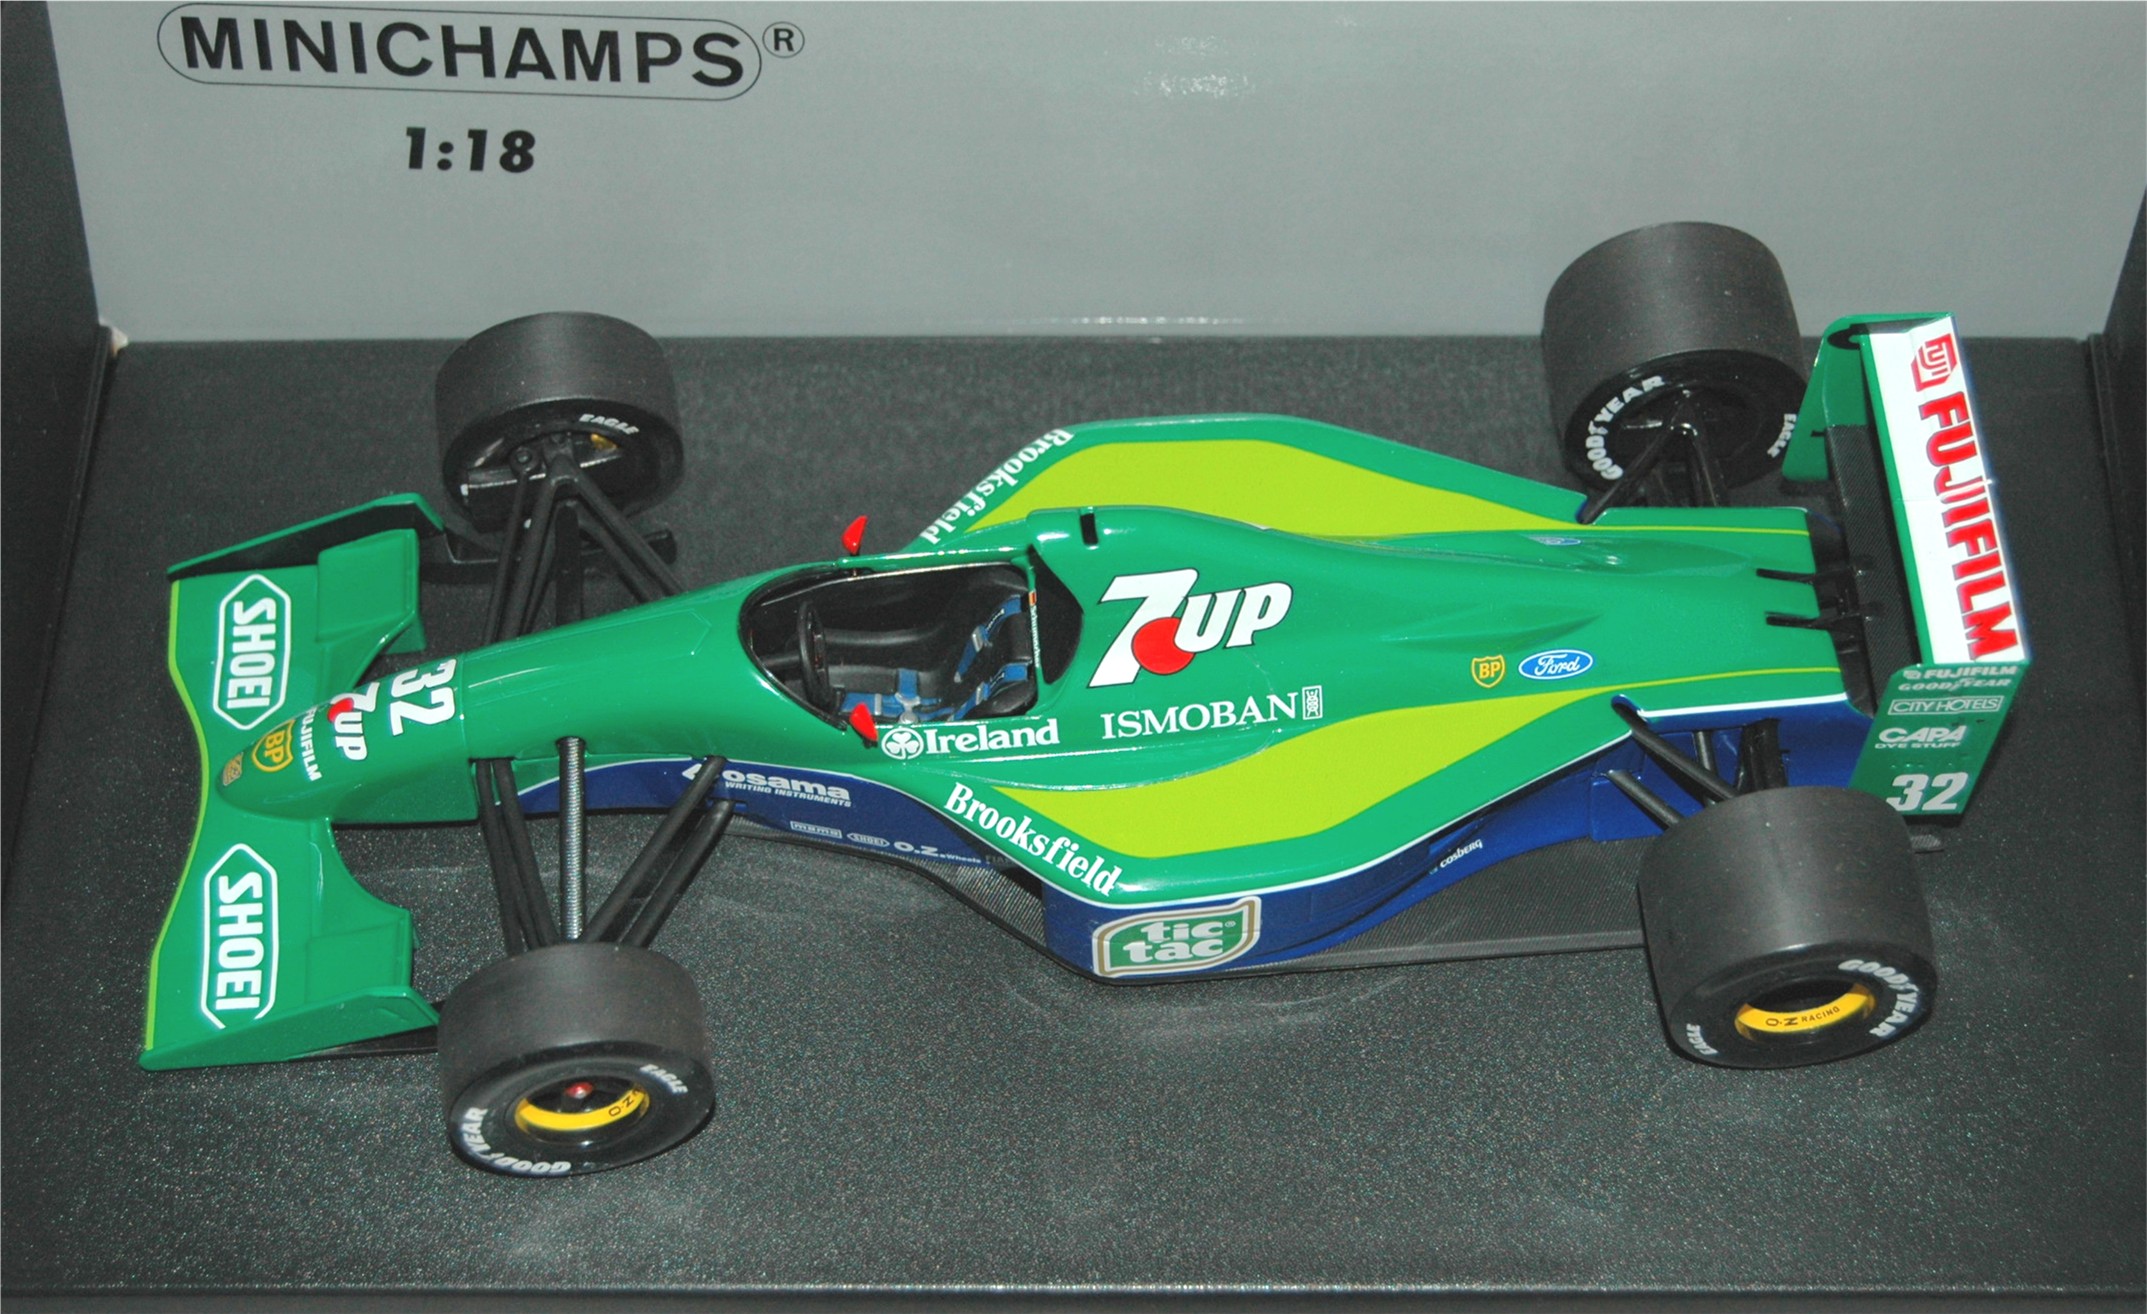
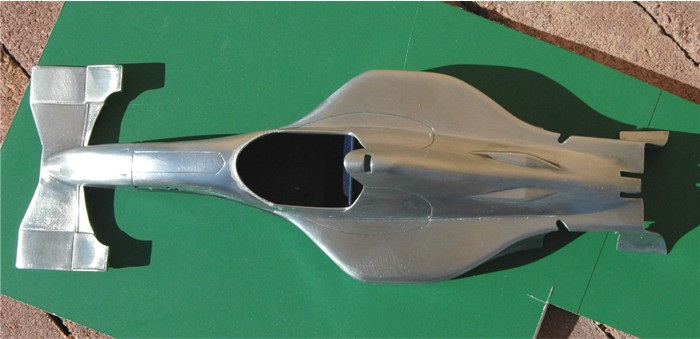
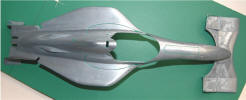
As all conversions done by me, under the banner of
Mac's Motoracing Models,
are "unique" so this will be slightly different to the last one.
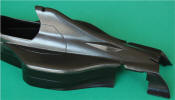
 Again I started this project using a
Minichamps Jordan 191, 1:18 scale Michael Schumacher "Donor"
car. This one supplied by Hilary. Again I started this project using a
Minichamps Jordan 191, 1:18 scale Michael Schumacher "Donor"
car. This one supplied by Hilary.
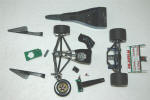
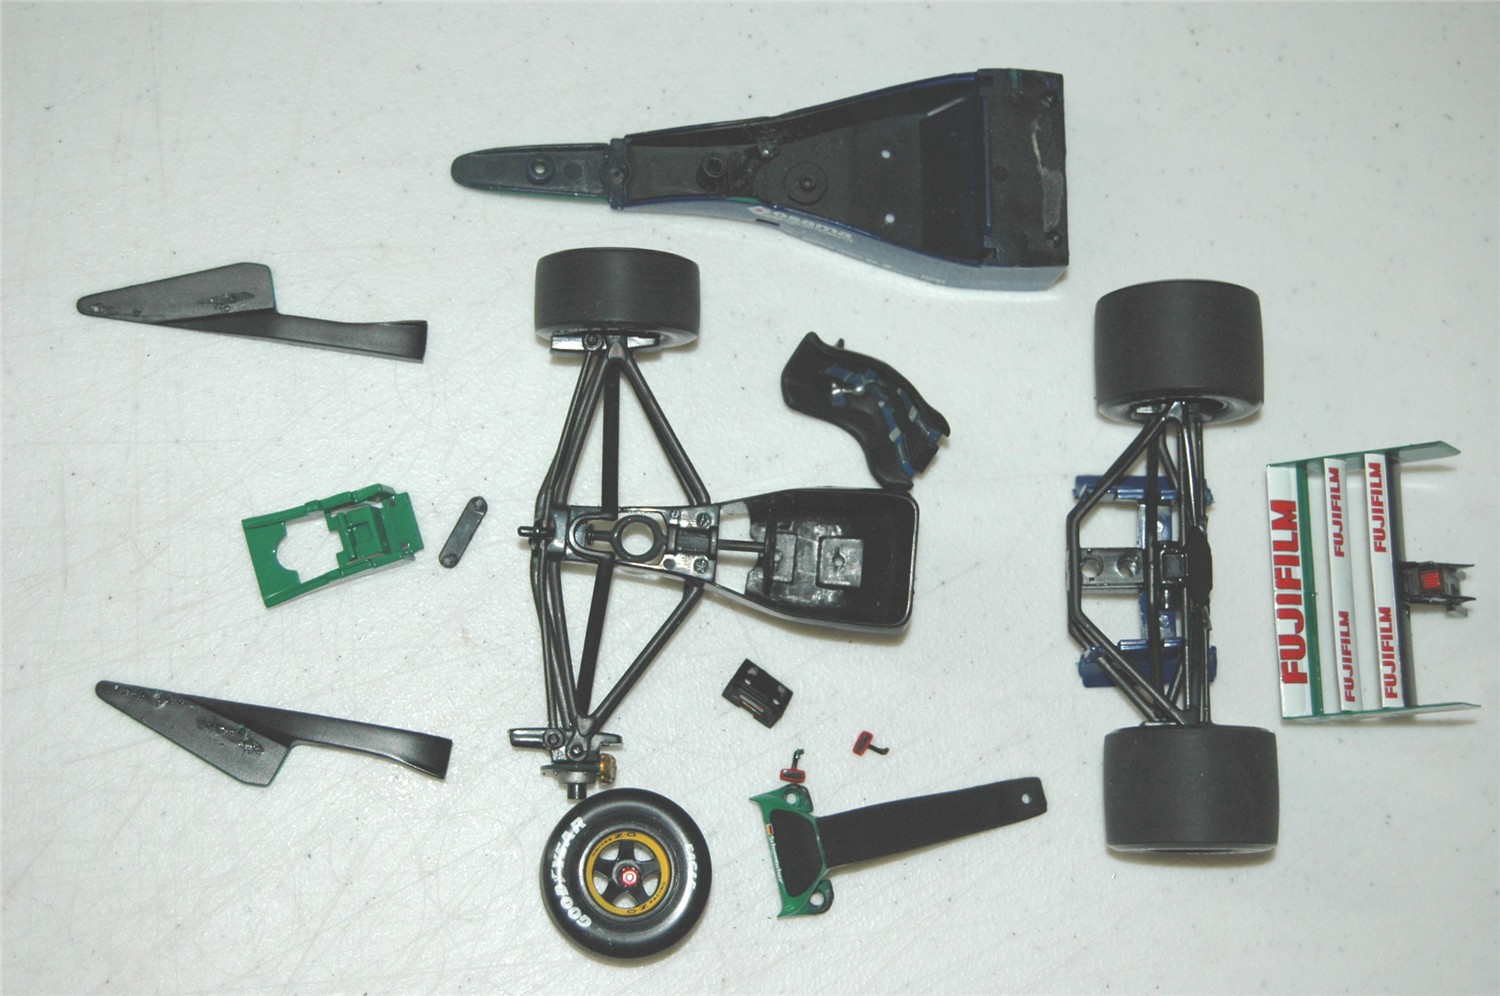
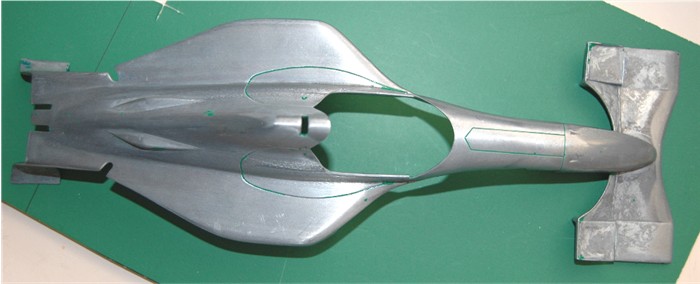
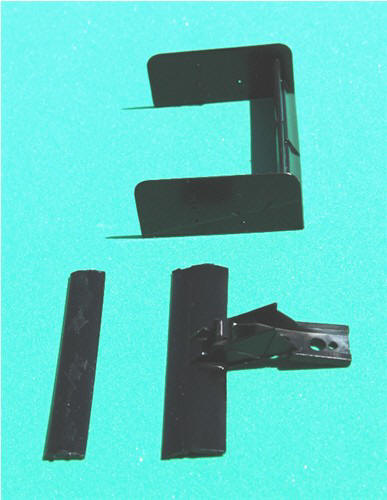
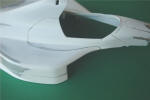
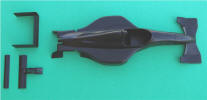
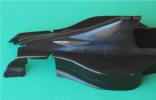
It was completely dismantled:
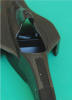
Removing one front wheel helps in the process, but is not
absolutely necessary. Care must be taken when removing the seat, front wheel
and steering
assembly so as not to break any parts. (Click on the Thumbnails to
enlarge the picture.)
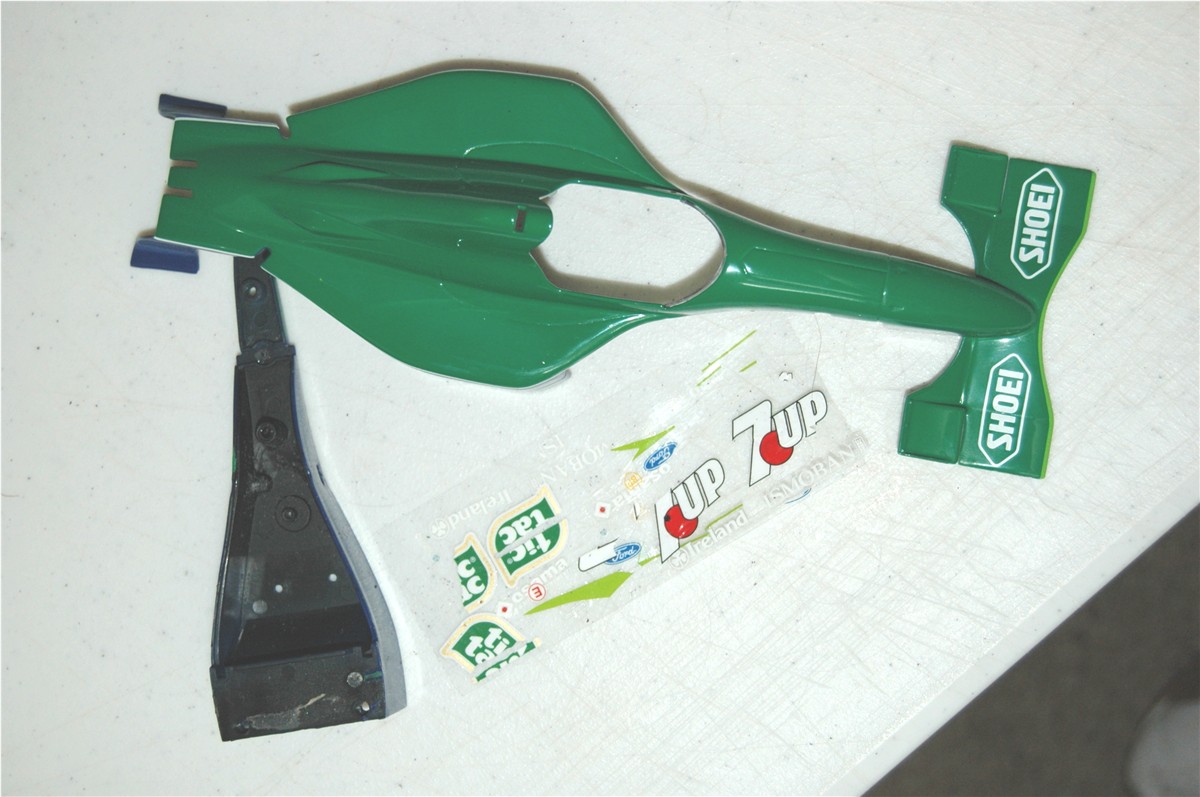
As this is a Minichamps model,
the decals can be removed very
 easily. Just lift the corner of
the decal with a modeling knife and peal off with a pair of
tweezers. Which is what I did for the large green ones on top of
the side pods. In a case like this there is no need for care in
removing them, so I used a piece of tape for
the others. easily. Just lift the corner of
the decal with a modeling knife and peal off with a pair of
tweezers. Which is what I did for the large green ones on top of
the side pods. In a case like this there is no need for care in
removing them, so I used a piece of tape for
the others.
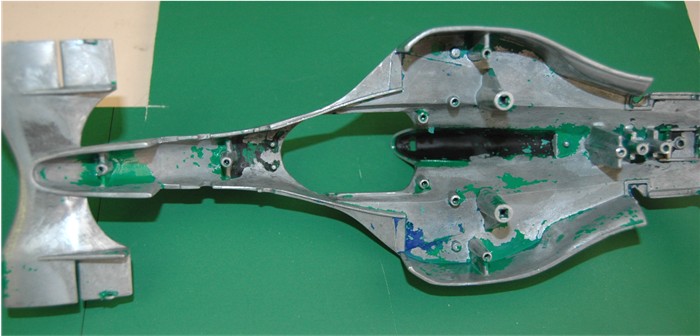
As you can see, some of the "Decals" are not decals and are
painted on. These are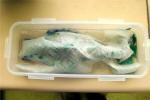 easily removed with acetone (nail
polish remover) dipped "Q-tips". I am doing a couple
of extra things on this one so I decided to completely strip it
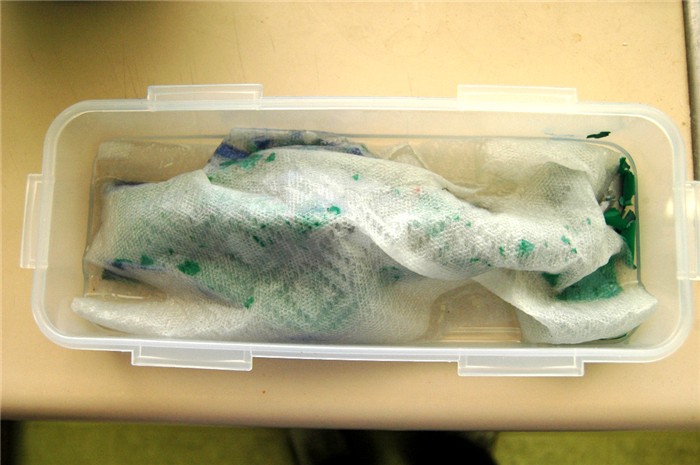
by letting it sit in a container of Lacquer thinners with a
paper towel draped over it, allowing the thinners to "wick"
through the towel and completely cover the body with the
thinners and fumes. It sat, with the lid on the container, for
approx. 60 minutes. I then removed it and washed off the loose
paint and removed the remainder with compressed air. easily removed with acetone (nail
polish remover) dipped "Q-tips". I am doing a couple
of extra things on this one so I decided to completely strip it
by letting it sit in a container of Lacquer thinners with a
paper towel draped over it, allowing the thinners to "wick"
through the towel and completely cover the body with the
thinners and fumes. It sat, with the lid on the container, for
approx. 60 minutes. I then removed it and washed off the loose
paint and removed the remainder with compressed air.
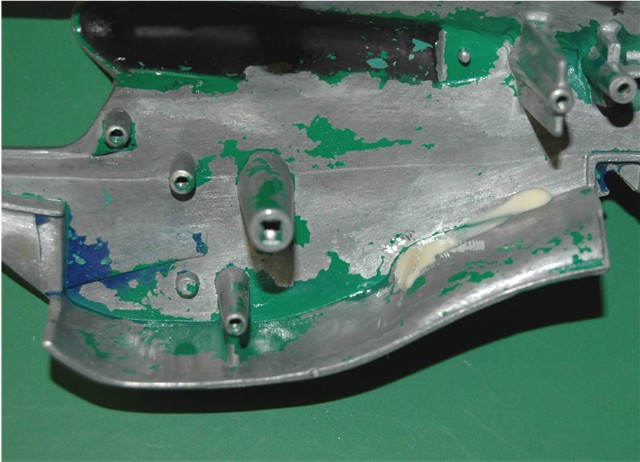
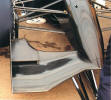
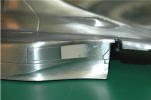
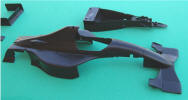
 Some paint remained in the body lines, which I will
scrape out. I can also see what work was done, originally, at
the factory before the paint was applied. I will have to scribe
parts of the body lines again as they have been almost buffed
out in places. The front wing is going to
receive some re-working as well. Some paint remained in the body lines, which I will
scrape out. I can also see what work was done, originally, at
the factory before the paint was applied. I will have to scribe
parts of the body lines again as they have been almost buffed
out in places. The front wing is going to
receive some re-working as well.
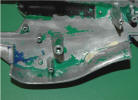
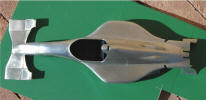
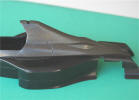
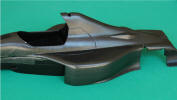
 From
the bottom, you can see how, just the fumes of, the thinners
removed most of the paint. What is left will not matter as it is
out of site and will be painted over. From
the bottom, you can see how, just the fumes of, the thinners
removed most of the paint. What is left will not matter as it is
out of site and will be painted over.
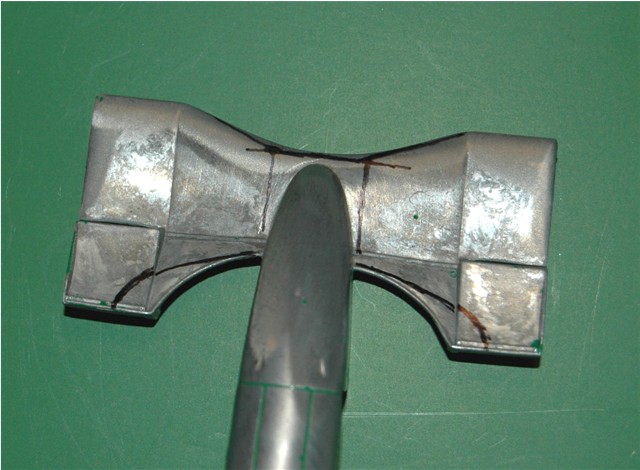
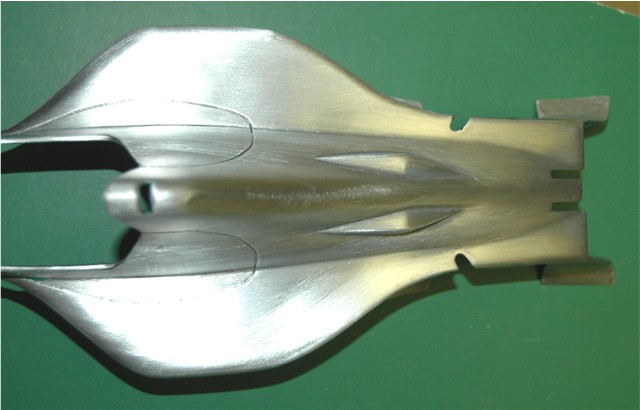
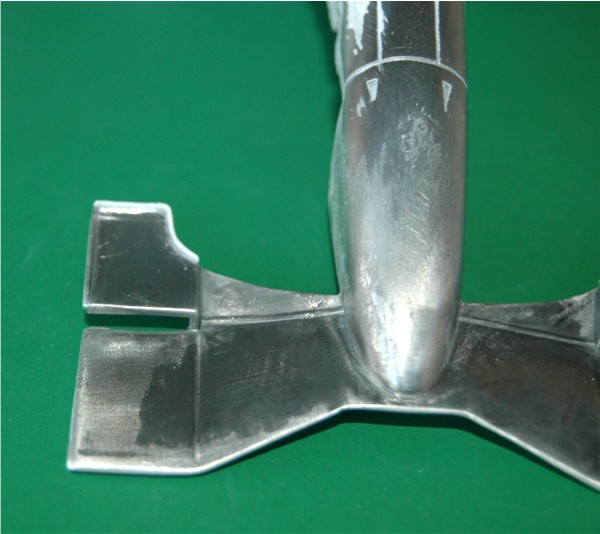
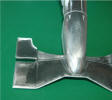
After looking at my reference pictures, the front wing
needs to be reshaped. It has too much curve to it and the upper
winglets are wrong.
 I have marked the wing, where I want to change it, and
here one I have marked the wing, where I want to change it, and
here one
 side
of the rear is done. That is just the lighting that makes it
look like it is burned but it is not. side
of the rear is done. That is just the lighting that makes it
look like it is burned but it is not.
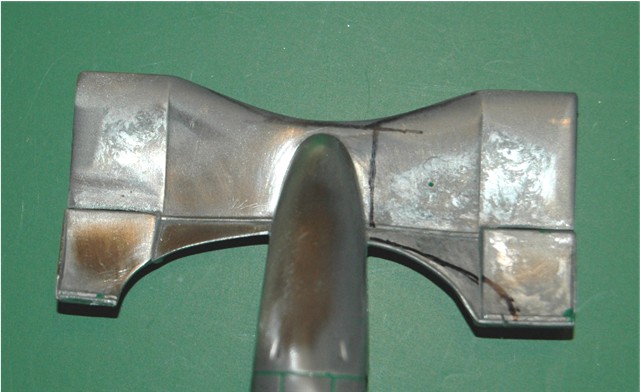
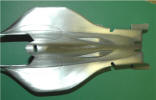
 This
is the rough work done. The front edge is squared off and angled
more as it should be, not curved. For reference This
is the rough work done. The front edge is squared off and angled
more as it should be, not curved. For reference
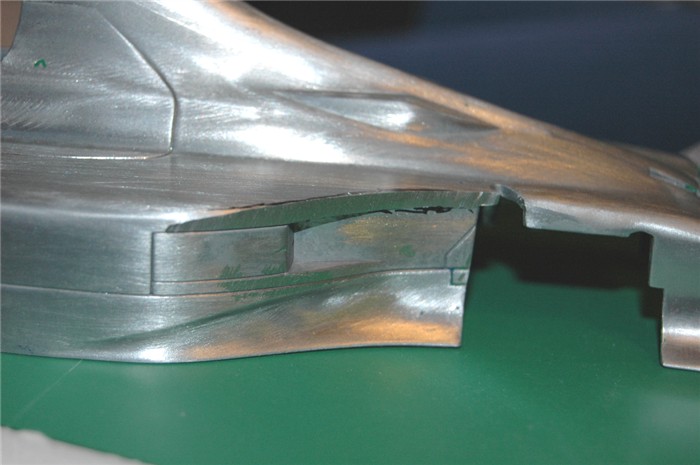
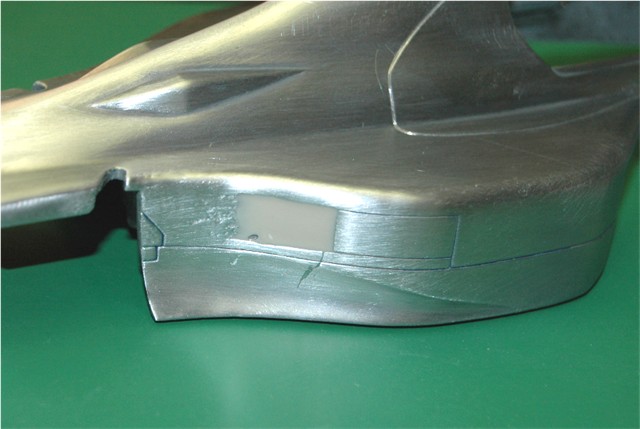
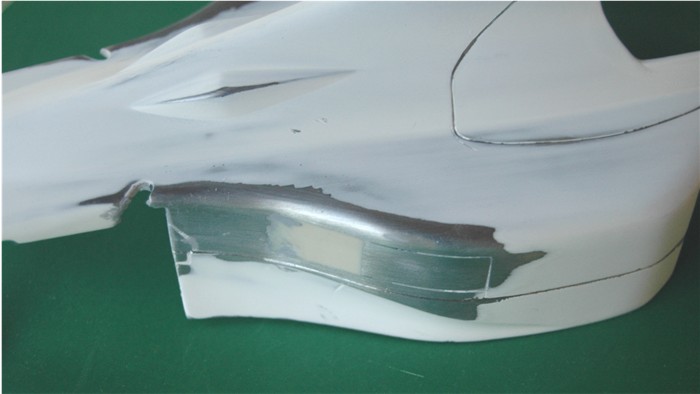
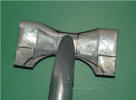
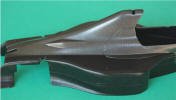
I will also correct the bodywork at the side pods. It needs to
be cut back behind the radiators and fill the recess. Note to
anyone with the 191, the first three races the bodywork was like
this, USGP, Brazil and San Marino.
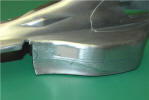
I started by grinding the top edge off the bodywork on both
sides

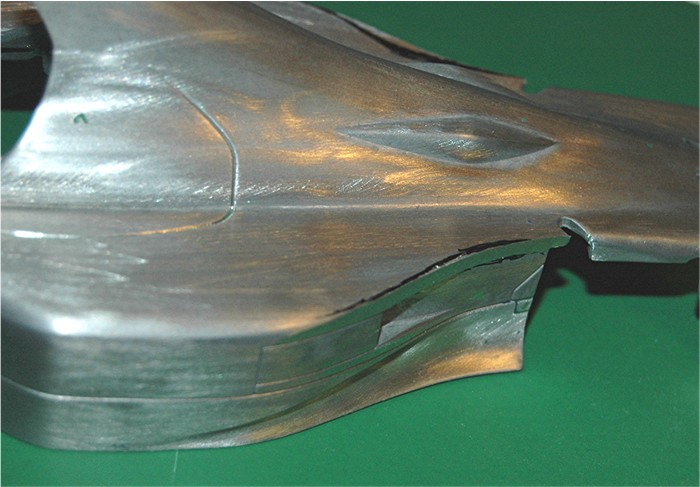
 the recess will have to be filled. I will rough the inside of
the recess with a Dremel bit and then cut through completely to
the inside. I will then stick some "Scotch tape" on the outside
and fill the gap with some resin, then sand it all to the
correct shape.
the recess will have to be filled. I will rough the inside of
the recess with a Dremel bit and then cut through completely to
the inside. I will then stick some "Scotch tape" on the outside
and fill the gap with some resin, then sand it all to the
correct shape.

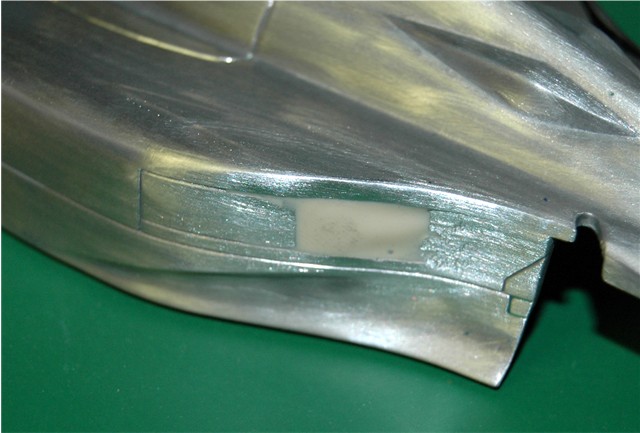
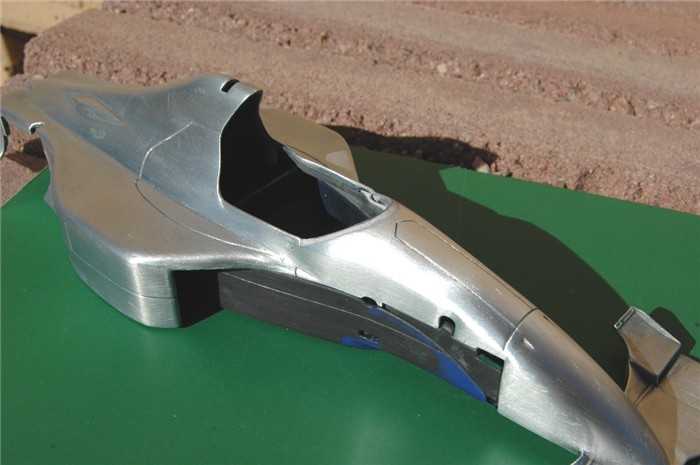
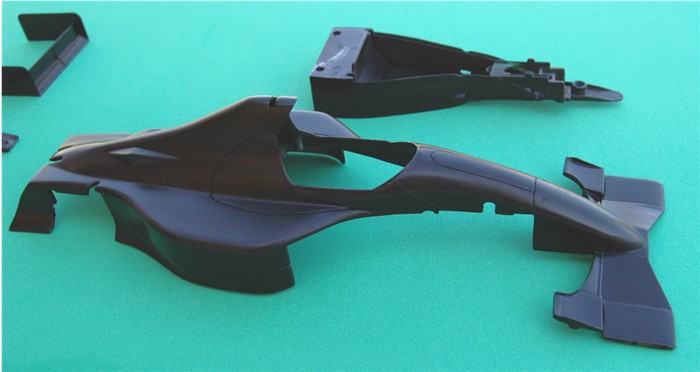
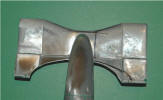
 Just a little clean up inside required, then the final
re-shaping of the outside of the body. Then I will make
templates for the carbon fiber decals.
Just a little clean up inside required, then the final
re-shaping of the outside of the body. Then I will make
templates for the carbon fiber decals.
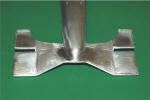
The initial reshaping is completed
 rounded off the top edge
 and sanded each side.
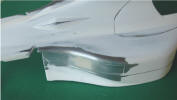
 A nice coat of primer will fill the small marks so I will have a
nice smooth finish to accept the semi-gloss black final
undercoat.
A nice coat of primer will fill the small marks so I will have a
nice smooth finish to accept the semi-gloss black final
undercoat.
After a few sessions of sanding, filling, sanding etc.

 I screwed the body pieces back together so I could scribe the
panel lines, so they will line up when finally assembled. I will
pull it apart again for painting.
I screwed the body pieces back together so I could scribe the
panel lines, so they will line up when finally assembled. I will
pull it apart again for painting.
Next the front wing has a little more detail added to the upper
elements.
 A little out of focus. I removed the metal element edges and
replaced it with 0.010" thick plastic flat strip attached to the
back edge with CA glue, then trimmed the height down slightly. I
still have to put the front of the angle in place, but I will do
that after it gets the base coat of black.
A little out of focus. I removed the metal element edges and
replaced it with 0.010" thick plastic flat strip attached to the
back edge with CA glue, then trimmed the height down slightly. I
still have to put the front of the angle in place, but I will do
that after it gets the base coat of black.
 Final fill and sand
 before it gets the Black semi-gloss undercoat.
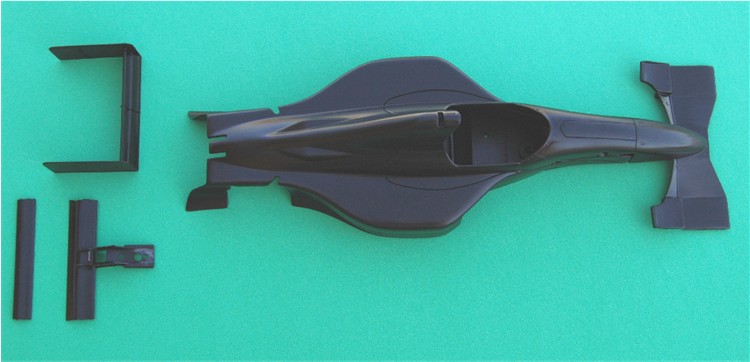
Update 8/30/09
It has been a little while, but I have done quite a bit since
your last visit.
The parts have all been painted in preparation for the carbon
decals.

 The main body parts will be assembled prior to the application
of the carbon decals, to ensure the correct "line-up".
The main body parts will be assembled prior to the application
of the carbon decals, to ensure the correct "line-up".
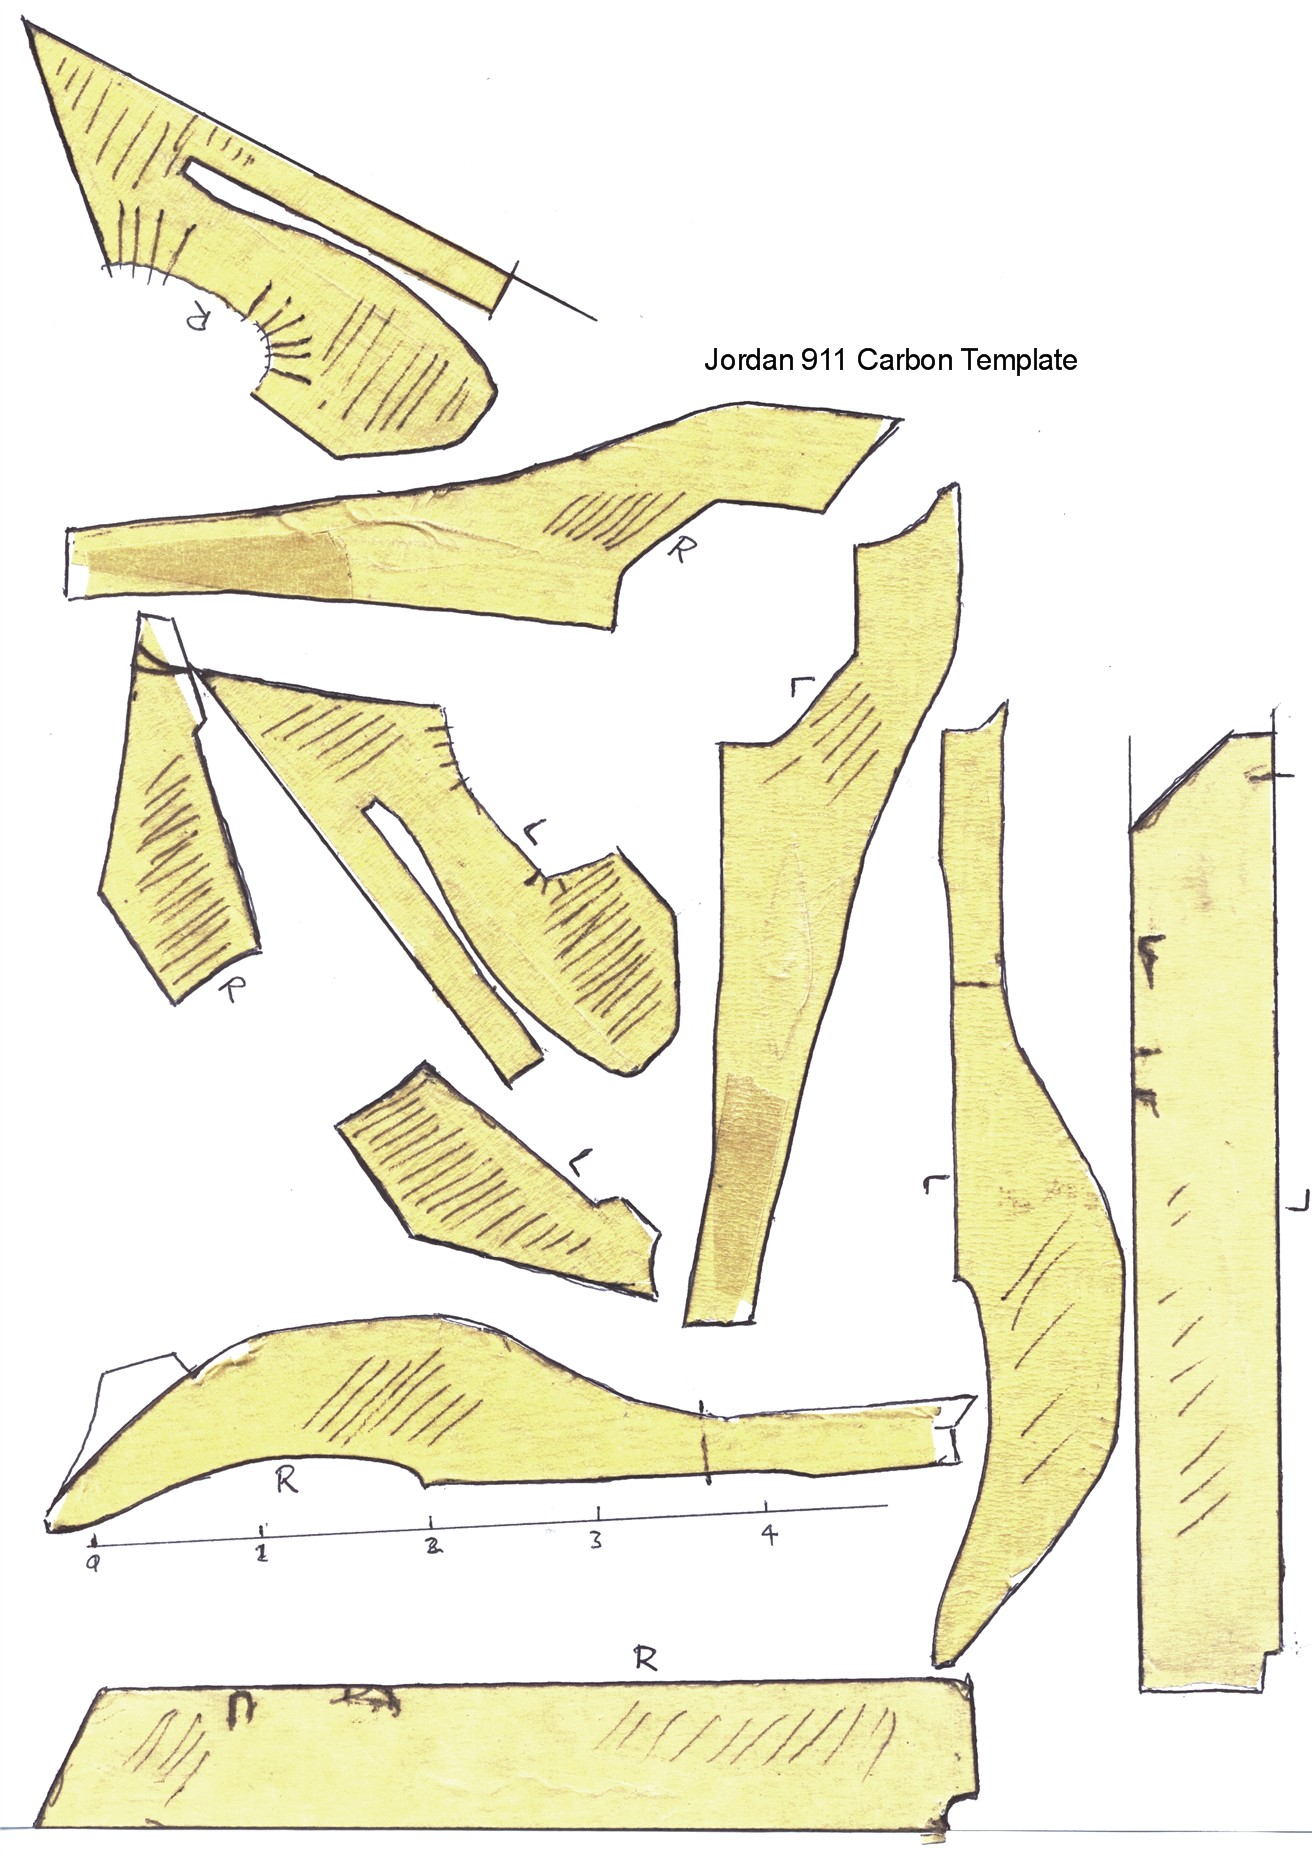
It is always best to create your own templates for the carbon
decals; I use regular "painters masking tape" that you can get
at any hardware store, because it's flexible enough to stretch
and peels off easily. I apply the tape to the section I want and
then with a NEW model knife blade, cut the shape I want; peal it
off and stick it on a sheet of plane white paper.
I then mark the direction I want the weave of the carbon to flow. I
do this for all sections, then I scan the sheet with all the
templates on it.
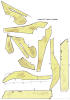 You will see I have also marked a "Scale" on the sheet. That is
so I know I have the correct size, after it is scanned and saved
into Microsoft word. I lay it out in the way the Carbon weave
will flow, so I have an idea of how many sheets I will need.
You will see I have also marked a "Scale" on the sheet. That is
so I know I have the correct size, after it is scanned and saved
into Microsoft word. I lay it out in the way the Carbon weave
will flow, so I have an idea of how many sheets I will need.
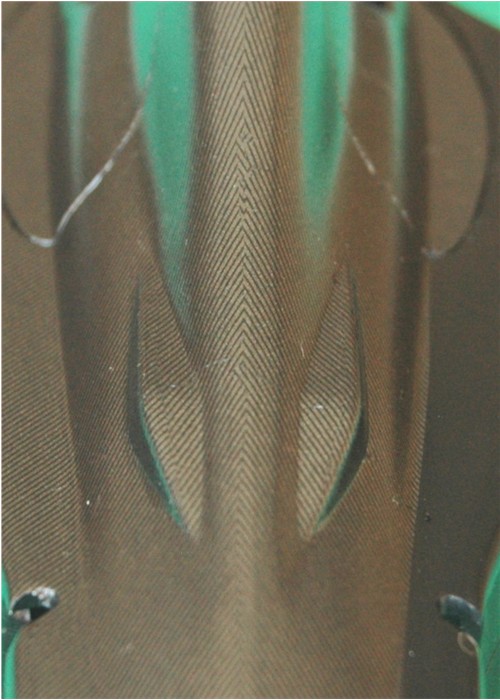
The suspension "bumps" in the bodywork are too severe to really
expect the carbon decals to follow the contour without tearing,
so I cut a small piece of carbon decal in a diamond shape and
split the bottom in the middle, from the middle of the decal.
You can see it applied here
 aligning it perfectly is not really a concern as you will see
later except to have it at approx. 45 degrees. Once those parts
are done I apply decals in a different place all together. It
will be 24 hours before I go back to the engine cover allowing
time for the decal to set more permanently.
aligning it perfectly is not really a concern as you will see
later except to have it at approx. 45 degrees. Once those parts
are done I apply decals in a different place all together. It
will be 24 hours before I go back to the engine cover allowing
time for the decal to set more permanently.
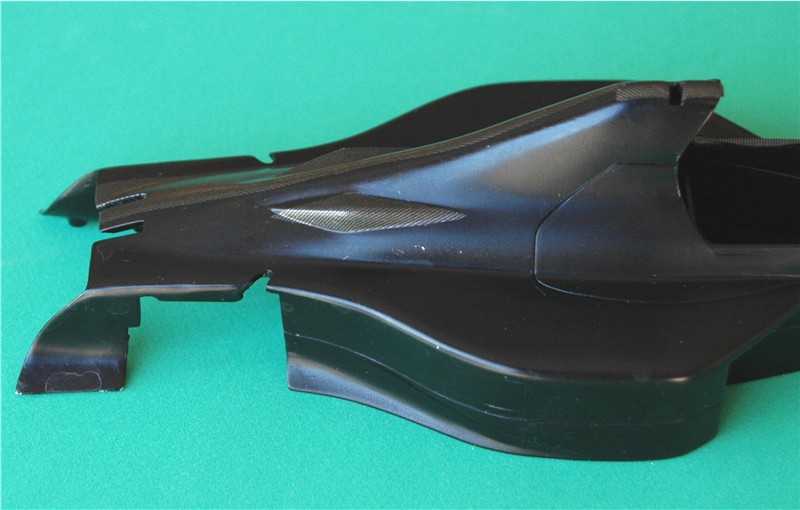
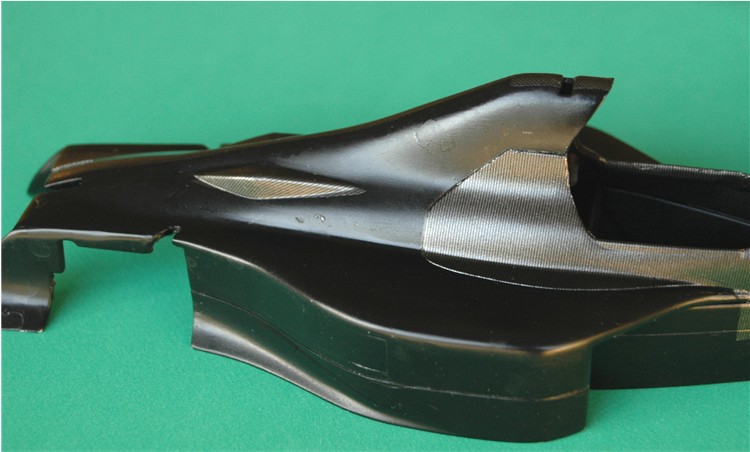
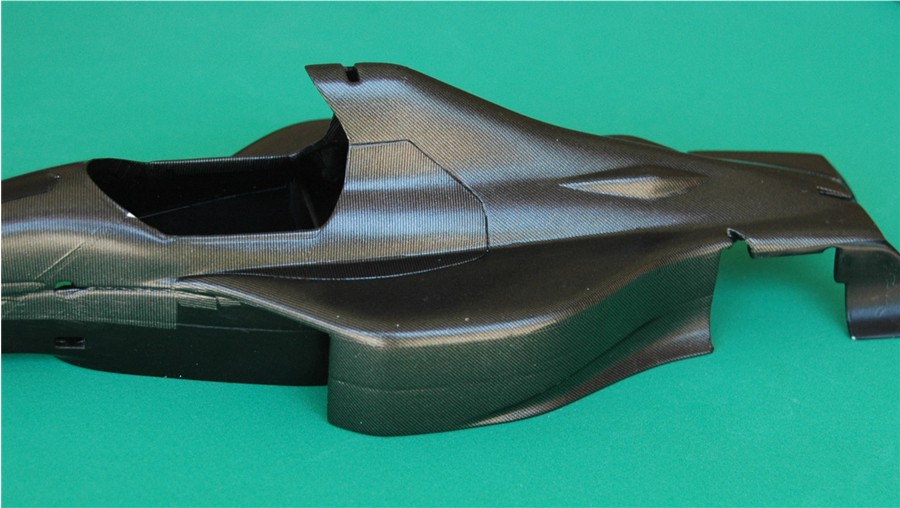
Here you see the decals applied to the tub section with the
vertical flow of the carbon
 I had previously done the left side
 When applying the decal on the air-box, it important to know
where the "bump" in the bodywork is and cut a slot in the decal
prior to soaking it. While the decal is sitting in the water I
give the part a coat of Micro Sol and then mix in some water
with a brush, I find this a better solution than using Micro
Set. It allows me to move the decal to the exact position I
want, with less likelihood of accidental movement. You do have
to be careful though not to damage other decals already in
place. You can barely notice the split in the decal over the
bump if you get it right. You would if you did not apply the
small decal at 45 degrees.
When applying the decal on the air-box, it important to know
where the "bump" in the bodywork is and cut a slot in the decal
prior to soaking it. While the decal is sitting in the water I
give the part a coat of Micro Sol and then mix in some water
with a brush, I find this a better solution than using Micro
Set. It allows me to move the decal to the exact position I
want, with less likelihood of accidental movement. You do have
to be careful though not to damage other decals already in
place. You can barely notice the split in the decal over the
bump if you get it right. You would if you did not apply the
small decal at 45 degrees.
It's Sunday now and I can apply the right side air-box decal
 The important part here is matching up the decal on the left
side as well as the "bump" on the body. Once I have the decal
where I want it I brush a coat of "Micro Sol" over it, to get it
to adhere to the contours, before using the hair drier. I then
use the hair drier for approx. 30 seconds. With a NEW knife
blade in my modeling knife, a BIG magnifying glass, and the
steadiest hands I can have, I start at the middle of the spine
and very carefully, with a very low angle of cut, drag the knife
blade to the end, then turn it around and do the same thing in
the opposite direction. I then carefully remove the cut pieces
with a pair of tweezers. Luckily the blade did not catch and I
am happy with the result
The important part here is matching up the decal on the left
side as well as the "bump" on the body. Once I have the decal
where I want it I brush a coat of "Micro Sol" over it, to get it
to adhere to the contours, before using the hair drier. I then
use the hair drier for approx. 30 seconds. With a NEW knife
blade in my modeling knife, a BIG magnifying glass, and the
steadiest hands I can have, I start at the middle of the spine
and very carefully, with a very low angle of cut, drag the knife
blade to the end, then turn it around and do the same thing in
the opposite direction. I then carefully remove the cut pieces
with a pair of tweezers. Luckily the blade did not catch and I
am happy with the result
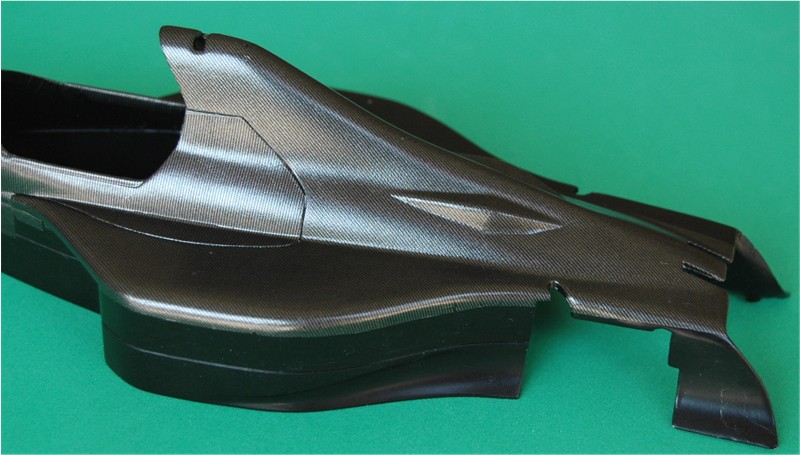
 It's not easy to photograph, but that is what I call a good
result. The green in the picture is just the reflection of the
green background. In this picture you can clearly see the joint
on the "bumps" as well.
It's not easy to photograph, but that is what I call a good
result. The green in the picture is just the reflection of the
green background. In this picture you can clearly see the joint
on the "bumps" as well.
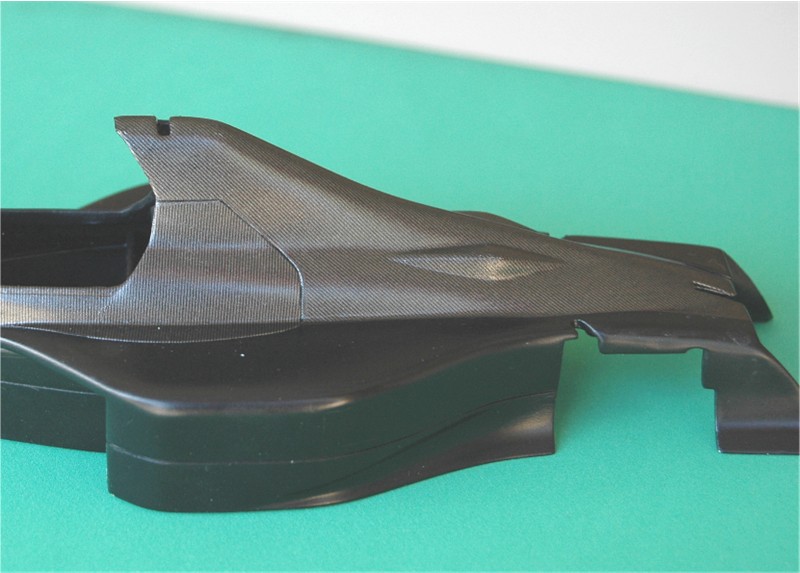
With the Right side done, I moved back to the top of the left
side-pod. I applied the decal in exactly the same manner. It is
difficult to see the joint
 which is what you want. I know it's a little difficult to see in
that picture but looking more closely you will see two
seems/joints
which is what you want. I know it's a little difficult to see in
that picture but looking more closely you will see two
seems/joints
 The one just to the right of the slot on the left and the second
just to the left of the same slot.
The one just to the right of the slot on the left and the second
just to the left of the same slot. The
rear wing is almost completed, but I did not take any pictures
of that, maybe for the next update. Small
Update 9/7/09
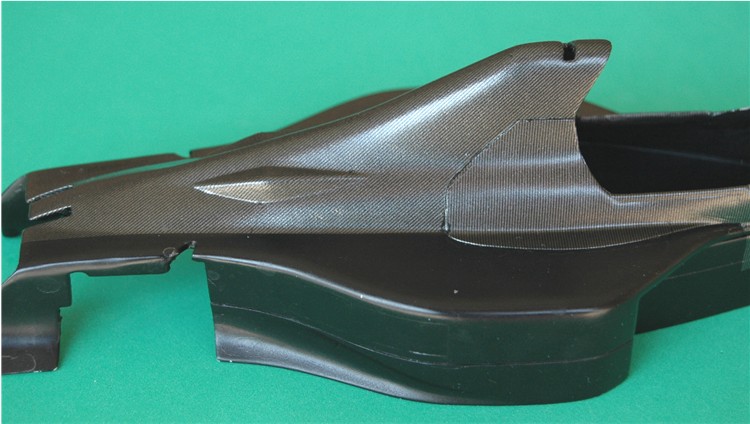
I have applied more carbon decals to the lower side of the side
pods and to the nose area of the cockpit.
You can see the direction of the carbon is mirrored on each side
 of the damper pocket. Its beginning to look more like it should
now
of the damper pocket. Its beginning to look more like it should
now
 Front wing and nose next..
 To view just the
pictures click here |